Tutorial-Canning Season


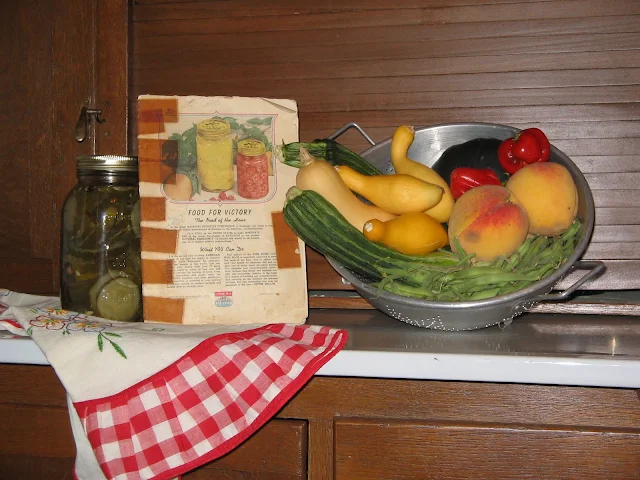
I am so glad you come by today, I can use some help with this canning project. Canning is always more fun if you have a friend. I remember my Grandmother, my Mother and her sisters and sometimes her friends would get together and can their fresh products. I have my Grandmother's canning book, and I was looking at it the other day. It is a Kerr Canning Book, on the front cover it tells all about a Victory Garden and how to preserve the fruits and vegetables from the Victory Garden. It also talks about how every little bit that we conserve will help the outcome of the war effort. Then I thought how far we haven't come...We are engaged in two wars, and our economy is as bad in some areas as it was during that
How To Can Green Beans and Black Eyed Peas
To prepare the jars we need to sterilize them. Boil clean jars in boiling water for five minutes until they are sterile. The jars need to be kept hot until they are packed with the product. The lids and the bands also need to be sterile and kept hot until they are put on the jar.
We will need to have our tea kettle full of hot water to fill the jars once the product has been put into the jar.
We also need to have all of our seasons that will go in the jar. We always use canning salt rather than table or sea salt.
Next we need plenty of space for the process and all of our tools laid out and ready to go because once we begin the process it moves really fast.
1. Using your tongs take the jars out of the boiling water
2. Pack the hot sterilized jars with the product leaving a good 1/2 inch at the top.
3.Season on top of the product. For these Beans and Peas we will use 1/2 teaspoon canning salt per jar.
4. Pour hot water into the jar covering the product and leaving a 1/2 inch space at the top of the jar.
5. With your tongs take the sterile lid from the hot water and place it on top of the jar, then quickly take the band from the hot water and screw it on the jar as tight as you can.
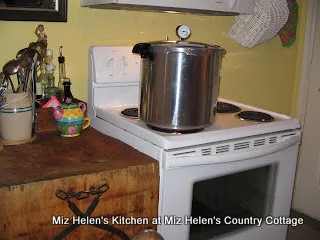
6. Place the jar into the Canning Pressure Cooker. When all the jars have filled your cooker fill the cooker with the amount of water required by the directions for your cooker and secure the lid.
8. Take the jars out very carefully not to disturb the product. Set them in a safe place to cool. As they begin to cool you will hear the little ping of the jar lid as it seals. That is very important. If that lid does not seal your product will not be preserved and all your hard work will be gone.
9. If all went well your product will be good for up to a year and for some products even longer.
I can tell you that there is nothing better on a cold winter's day than to open a jar of homemade soup made from fresh garden vegetables from the summer. We usually can enough in the summer that it last us until the garden is producing the next year. There are many advantages to preserving your own food, it is much more economical, you are in control of the quality of the product, and it is so good.
I can tell you that there is nothing better on a cold winter's day than to open a jar of homemade soup made from fresh garden vegetables from the summer. We usually can enough in the summer that it last us until the garden is producing the next year. There are many advantages to preserving your own food, it is much more economical, you are in control of the quality of the product, and it is so good.
I am so glad you came by to help me today, I know I'm tired to, and it is hard work, but it is a good tired and it will be so good! The next time we talk about canning we will explore the cold pack method of canning. You hurry back to see me...
Peace and Joy
Miz Helen
Peace and Joy
Miz Helen


 Older Post


i'm exausted watching you and Leonard I need nap this is killing me.
ReplyDeleteCharlie
Oh Mom this brings back so many memories and makes me want to go to the Farmer's Market. is your ceiling clear???? :)
ReplyDeleteit is becuase of women like you who keep our heritage alive that make the day worth waking up for. You are my inspiration...God bless you.
I'm wondering how you make your soup before you can it? How do you know how long to process it? Does it depend on what you're making - like if the ingredients are acidic?
ReplyDeleteAlso - do you have to use a pressure cooker with a gauge or can you use any type of pressure cooker?
Great post with lots of important information.
Amy I chop all the ingredients of the soup, then pack it in the jar, then the season, then the hot water. I usually pressure it 10 lbs. for 15 minutes. When you open the soup to use, just add water, it is wonderful. I am going to post on the soup in late August or early September, that is usually when I make mine.
ReplyDeleteThe acidic soup like tomato, I always give the same time.
You can use any kind of pressure cooker. Just watch the pressure and the time.
I went to our Cowboy Church this summer and some of the ladies show us how they did it and important ways they did canning. It is easy to make jelly also. Thanks for sharing. I have been greathering up stuff and want to get into it next year. Or maybe I will start a fall garden.
ReplyDeleteThank you for this tutorial! I cant wait to try my hand at it now. On my way to find your other canning post.
ReplyDelete